

Coffee 101: How To Brew An Aeropress
This post is brought to you in partnership with Best Coffee.
AD | The products in this review were gifted to me but all opinions are my own. We at The Grumpy Olive do not accept payment in return for a review and will not publish anything unless we love the product. Please refer to our Privacy Policy here.
Hello! And welcome to another episode of How to brew coffee at home! Today we are embarking into how to brew an Aeropress.
What is an Aeropress you ask? Well, it’s a plastic tube, basically, that you can use to make coffee in a quick and easy way and looks like this:
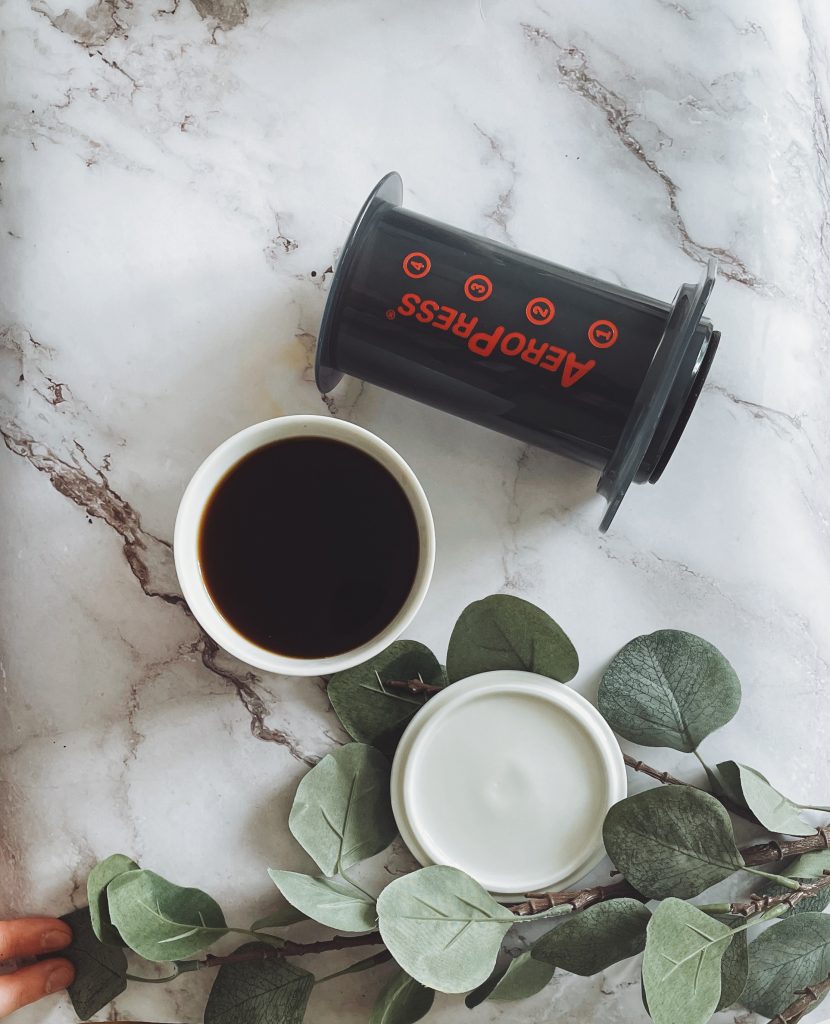
It is great for travellers, that want to bring their coffee equipment by themselves. It was invented by the same guy that invented the “Aero Ring” in the 80s.
There a couple of methods to brew and Aeropress, but the one that is mostly user friendly is what we call the “Inverted Method”.
So without further ado, here’s how to brew one:
How To Brew An Aeropress
Difficulty: Medium
Materials
- Aeropress
- Aeropress filters (these come when purchasing the Aeropress)
- A Kettle, Preferably with temperature control
- Filtered Water
- A decanter
- A Good quality scale
- A timer, if your scale doesn’t offer the option
- 13g of freshly ground coffee, towards the size of sugar granules
Instructions
- If you haven’t ground your coffee, grind it now and place it on the side.
- Put the filtered water in the kettle, and heat the water up to roughly 92C. (1)
- Place a paper filter in the filter cup, with the decanter underneath, and once the water is ready ensure the filter is well wet all throughout. The paper should adhere with no air bubbles.
- Empy the water in the decanter, and place it on the side.
Here are some pictures of the process, that should help you with the steps.

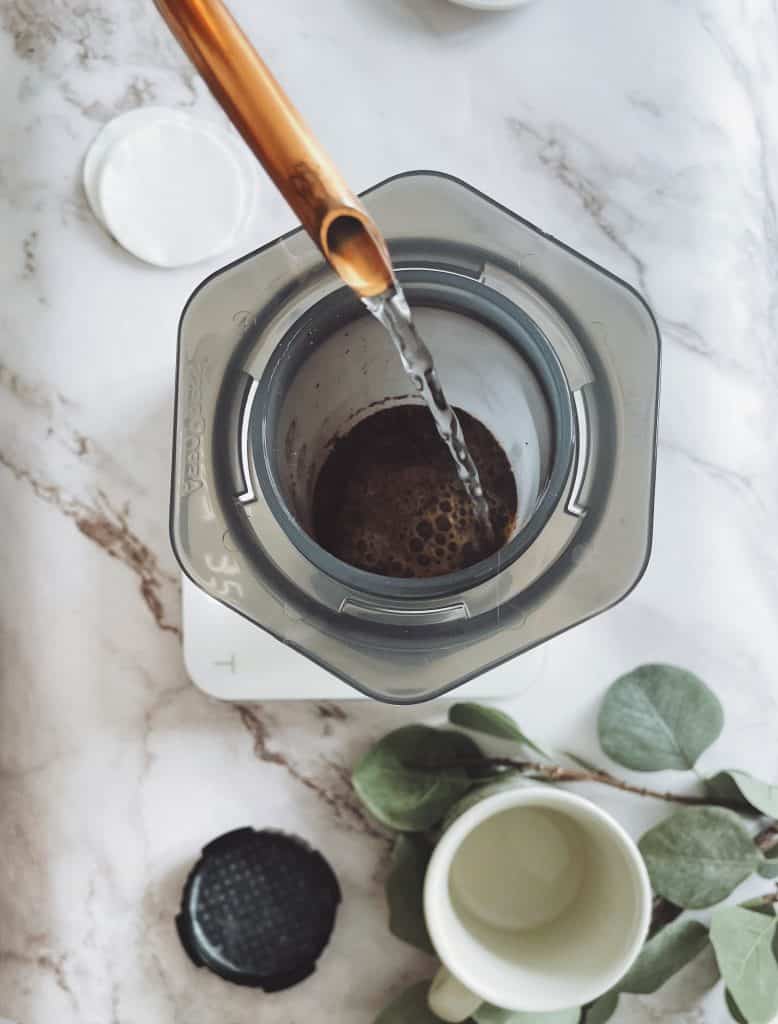
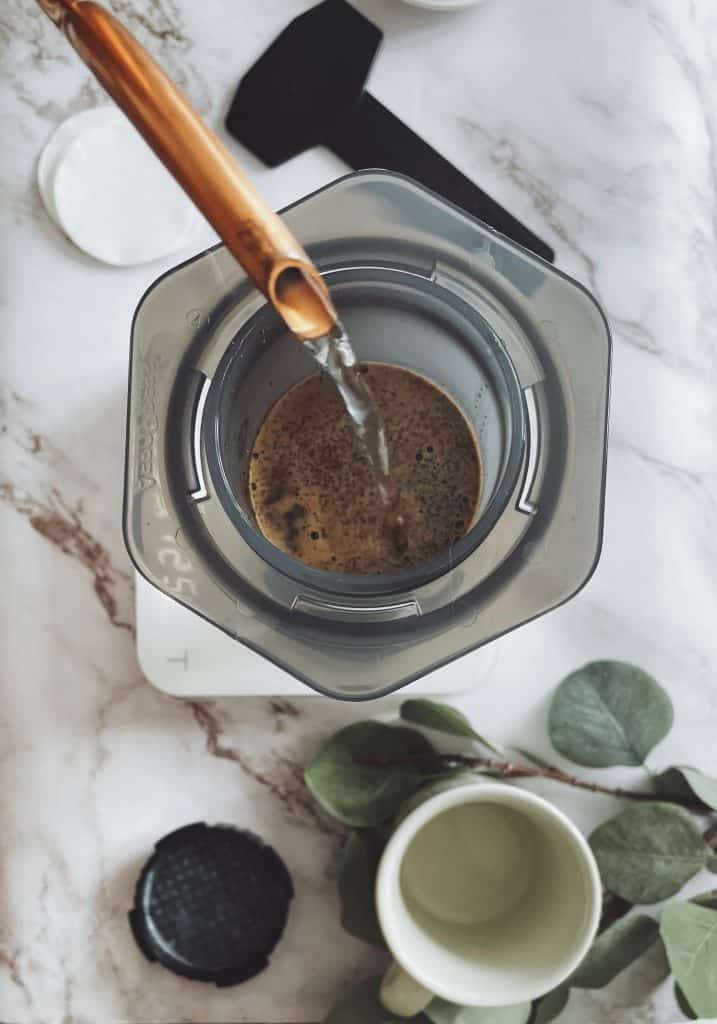
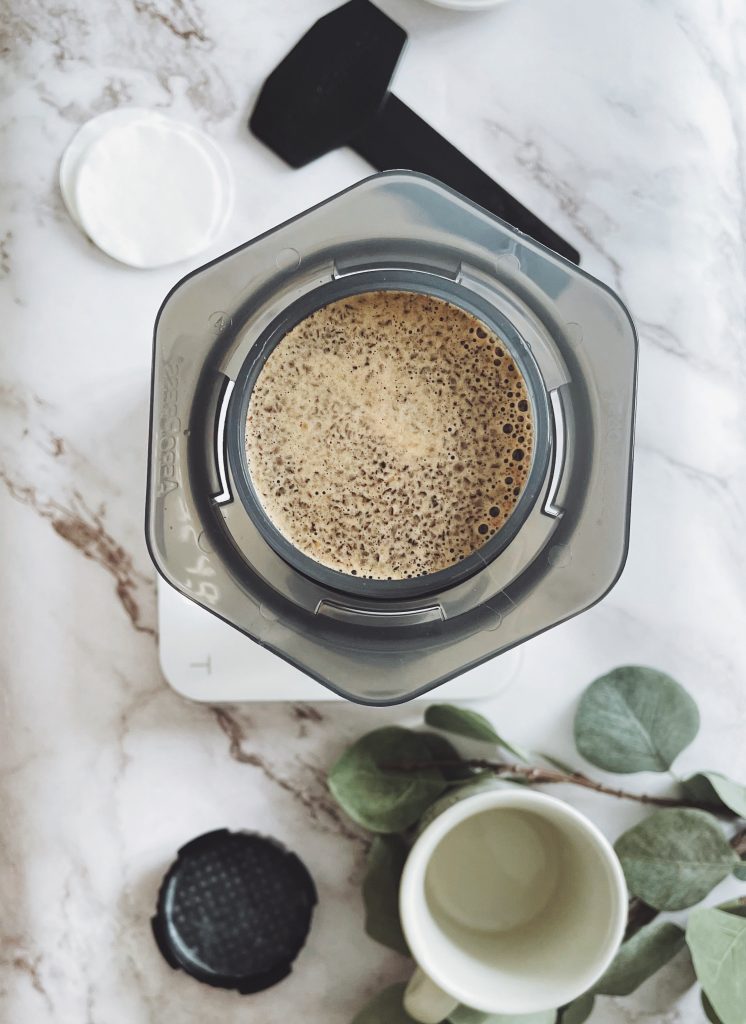
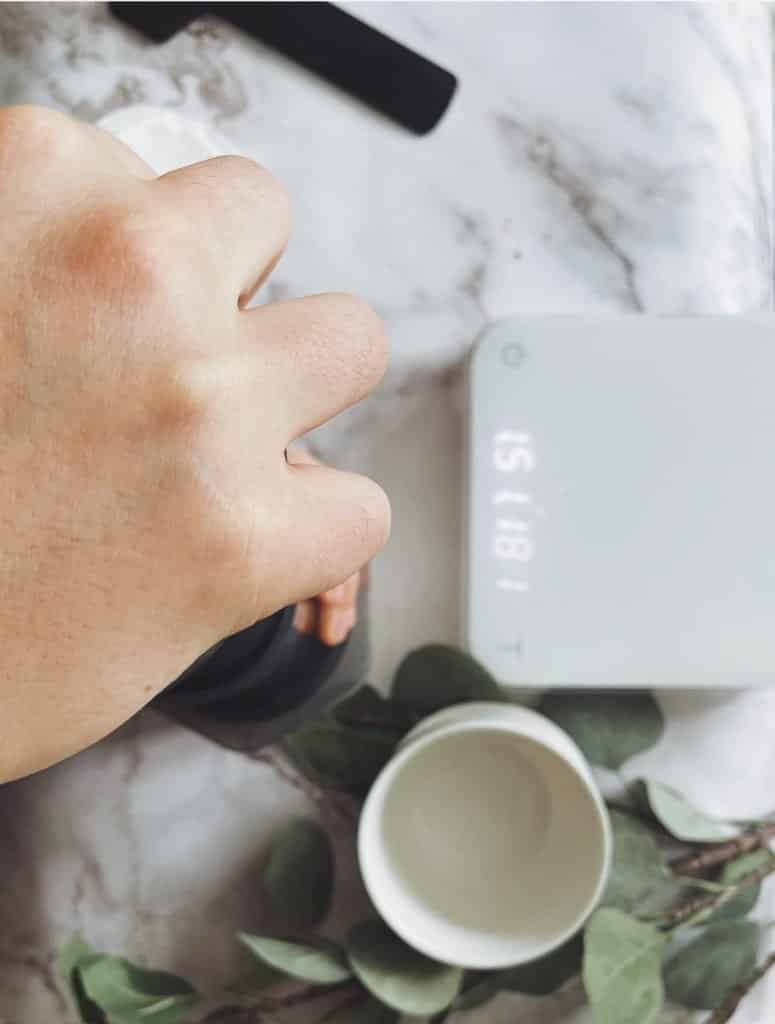
Personally, I still prefer a pour over, even when travelling. But some people prefer the Aeropress because it resembles more an espresso and has more body.
ANNOTATIONS AND EXPLANATIONS…
Before you brew, read these annotations and explanations. They are quite geeky, I know.But it will make sense of the brewing process.
- Water Temperature: as I said, the ideal water temperature is 92C. Without getting too geeky on this, this is because this is the optimal temperature for water to grab all the nice compounds that make our coffee taste so nice. If you were to use boiling water, so straight out from the kettle, it would also grab very bitter compounds, and make your coffee taste over extracted. In the chance of not having a temperature control kettle, just boil the water and leave it to sit for a couple of minutes. That will do the trick!
- the Bloom: the first part of your brewing process is called the bloom. This is because, just like a flower in spring, it’s when the coffee starts to open and release all those aromas and compounds that make our coffee so tasty. If you notice, it bubbles during this stage for this reason! It is not really needed in an Aeropress, but I found out it brings more out of the coffee itself.
- Choice of decanter: I personally don’t like to tell people what to use, but here I have to warn you. Do not use a glass cup or decanter, you will end up smashing it. People underestimate how much pressure they put when pushing the Aeropress down. Don’t make that messy mistake, use a sturdy china cup!
- Grind Size: again, I could be here forever talking about this. When grinding for Aeropress, you want a similar size to a sugar granule.So not too coarse but not too fine either. If your brew tastes very acidic at the end, just fine your grind a little to balance it out. Simultaneously, if it tastes to bitter, coarsen it up a little. Don’t go too far out with changing your grind size, it could be trouble and frustrating!
One thing I should mention – you can make plenty of drinks too just by using the Aeropress! Have you seen this Frozen Irish Coffee from our friend Lynn? You don’t want to miss out on it!
Well, this is all my friends! Let me know in the comments below what you think and if you need help!x
The items on this post are subject to availability and all prices are correct at the time of publication. All prices shown in this post are also subject to delivery charges – please check out the item you intend to purchase for more details on delivery costs.
pin this!



I roughly double the coffee — two Aeropress scoops — in my recipe. Then I mix in frothed oat milk.
I have never capped while steeping — may try that.
Love Aeropress!
I have never heard of this! Now I have to see if we have it in the States. It sounds like an interesting method and a great way to make coffee while traveling. I will have to check it out! Thank you. 🙂
I am not a coffee drinker and I have never heard about or tried the aeropress but it does sound like something that would be super useful for the coffee drinkers. I love the fact that it is portable and easy to carry about. I might as well recommend it to my friends who drink coffee.
I’m a coffee drinker and this post makes me curious about the Aeropress. Thanks for adding pictures. It makes the brewing process easier to follow. Thanks for sharing.
Corinne
Thank you for reading Corrine!
What a great idea. I don’t drink coffee but I can see how it would be great for coffee drinks, it’s great that it is portable! Thank you for sharing.
Lauren
Thanks Lauren!
This is ridiculously cool! I have all sorts of coffee-making equipment at home but I don’t have an Aeropress. I would definitely like the fact that it can produce something a bit like an espresso — thanks for the info!
Ahah tell me about it! I have to reorganise it to make sure it’s in a good place lol
Ooh! So interesting. I don’t know too much about coffee but I’m always interested to learn! Only last year did I discover french press haha. I would totally try this out! Thanks so much for sharing xx
http://www.lynnmumbingmejia.com
Thank you Lynn! Xx
I’m not a huge coffee drinker but this does sound like a great coffee maker! x
Lucy | http://www.lucymary.co.uk
Thank you!
My ex boyfriend used to have one of these and I always wondered what it was for! hahaha!
Katie | katieemmabeauty.com
Ahaha now you know! 😂
I haven’t seen the AeroPress before, but my partner loves coffee so I think it would make a great birthday present for him! I also showed it to him and he said that it’s supposed to make the best coffee.
Glad I could be of help!x
Coffee is life! I wonder what I did before I started drinking coffee! This sounds like a great way to have coffee on the go. My partner in particular loves ground coffee.
Thanks for sharing such a detailed guide x
I wonder the same too! How did i function before! Ahah
I’ve never heard of an aeropress before! Literally asking my partner if he wants one now because he’s a huge coffee drinker. Thank you for sharing.
Ahah brilliant. How do you guys make coffee normally?
I am definitely getting one of these!!
Glad I could be of help!
Oh wow. I haven’t heard of an aeropress before. What a cool product. Thanks so much for sharing this!
Thank you for reading!
An effective and flavorful way to make coffee. I love that this press is so compact; with a bag of beans it would make for the perfect way to keep drinking my favorite blend when I am not at home. The downside is, though, I might not be as motivated to try the local blends and coffee shops . . . 🙂
Thanks for sharing!
Yeah, I get what you mean. I would probably take it with me for like camping, or where you don’t have good coffee options, if that makes sense? I normally don’t travel with any coffee equipment. I used to bring our pour over every time we went home, but we equipped our mom with one now so I don’t have to anymore ahah
I’m a huge coffee fan but have to admit that I really didn’t know anything about an AeroPress until this post! It sounds like such a great travel item 🙂 x
https://www.femaleoriginal.com
Thank you Faye!x
I absolutely love coffee (it’s one of my top considerations whenever I travel), so this looks like a fantastic addition to my essentials bag – I love it being portable, which is an improvement over cafetieres
Definitely! Is very easy to use as well, and super easy to clean too!
Cool post, I love coffee
Thanks for sharing
https://uncuaderno4cero.wordpress.com/
Thank you!
My husband is a dedicated aeropress user. He even has a home and travel one. LOL
AHAHAH I love this.
So handy that is is portable! I’m not very clued up on coffee, having only just got back into drinking it last year but this was interesting! x
Thank you Jenny!
I absolutely love the fact that the Aeropress not only gives you great coffee (assuming you have some quality beans) but also that it’s portable so great for travelling (when we can do that safely again). Fab review, thank you so much for the detailed step-by-step! x
Oh, glad to see you love it! Thank you for your kind words!